How to clean my Philips 5000 Series Cordless Vacuum Cleaner
Published on 26 March 2024
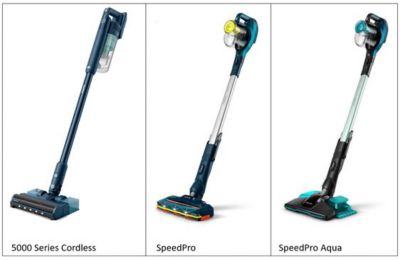
To learn how to clean the dust bucket, filter, brush, and water tank of your Philips 5000 Series SpeedPro (Aqua) Vacuum Cleaner, check out the sections below.
Dust Bucket Please remember to empty the dust bucket after each use or when the dust reaches the MAX level indicator (image A1).To clean the dust bucket of your Philips Cordless Vacuum Cleaner, follow these simple steps:
Turn off the appliance (image A2).
Hold the appliance at a 45-degree angle as shown in image A3. Remove the dust bucket by pressing the release button, located at the bottom of the bucket.
Tip: Remove the dust bucket while keeping the appliance in an upright position to avoid spilling pollution (image A4).
Hold the two blue dented circles on the side of the colored part and lift it out of the dust bucket (image A5).
Empty the collected dust in the dust bucket over the trash bin (image 6).
Place the cyclone back in the dust bucket and make sure the two parts are aligned (image A7).
Place back the dust bucket by first aligning the filter side of the bucket before hinging it in place (image A8).
Filter To ensure optimal performance of your Philips Cordless Vacuum Cleaner, it is important to regularly clean the filter. Follow these simple steps:
Lift the filter to remove it from the dust bucket (image B1).
Separate the washable foam filter from the plastic filter case (image B2).
Tap the foam filter and the filter case over a trash bin to clean (image B3).To thoroughly clean the filter case it helps if you tap it very firmly over a trash bin until no more dust is coming out of the filter case.
Rinse the foam under the tap and squeeze it until clean water comes out (image B4). Remember not to rinse the filter case.
Note: for the best cleaning result, run the water through the filter with the dirtier side facing downwards, allowing deeply set dust to be washed out.
Wait 24 hours until the foam filter is fully dried (image B5).
Note: do not dry the sponge filter in direct sunlight, on the radiator, or in the tumble dryer.
For thorough maintenance, clean the dust bucket and colored part under a
running tap or in warm soapy water (image B6) and wipe them dry (image 8).
Reassemble the parts (images B7-10).When you place back the dust bucket first align the filter side before hinging it in place (image B10).
Note: for optimal performance, we recommend cleaning the filter of your vacuum cleaner monthly and replacing the filter every 6 months (Accessory XV1651). Brush Your Philips Cordless Vacuum Cleaner has a rotating brush located inside the nozzle. This brush can become clogged with hair and needs regular maintenance. Please follow the steps below to clean the brush:
Switch off the appliance (image C1).
Hold the button on the side of the nozzle with one hand while removing the brush with the other hand. (image C2).
Remove all visible pollution by hand. Cut and remove any tangled hairs from the brush (image C3).
Remove the side cap (image B4) and remove hairs in between (image C5).
Insert the brush back in place, and your vacuum is ready to use (images C6-8).When reassembling the brush, ensure proper alignment by first placing one side in position before clicking on the other side.
Note: Please also check and remove any pollution around the nozzle wheels. Water tank To keep your water tank in good condition, we suggest following these easy steps for cleaning and drying after each use:
Remove the cloth from the water tank (image D1).
Empty the water tank (image D2).
Fill the water tank under the tap and shake it to remove detergent residuals (images D3 and D4)
Empty the water and leave it open to dry. Make sure to not lose the tank cap during storage (images D5 and D6)
Clean the cloth by rinsing it or putting it into the washing machine.
We recommend replacing the cloth every 6 months (accessory XV1630).
Dust Bucket To clean the dust bucket of your Philips Cordless Vacuum Cleaner, follow these simple steps:
Turn off the appliance.
Release the dust bucket by pressing the button and taking the lid off (images A1–2).
Empty the dust bucket into the rubbish bin (image A3).Make sure that you also remove any hair and dirt stuck in the cyclone (the colored part inside the dust bucket).
Remove the filter from the dust bucket (image A4).
Clean the inside of the dust bucket with water or a damp cloth (images A5–6). Note: Please do not put the dust bucket in the dishwasher.
When the bucket is completely dry, reinsert the filter and place the bucket back (images A7–9).
Filters To ensure that your Philips Cordless Vacuum SpeedPro performs at its best, regular cleaning of the filter is essential. There are two different filters, and both will fit. Please determine which filter you have and follow the simple instructions below.
Filter 1:
Detach the dust bucket (image 1).
Take out the filter (image 2).
Tap the filterto release loose dirt (image 3).
Wash the filter with the grid side facing upwards (image 4).
Let it dry for 24 hours with the grid side facing upwards (image 5).
Reinsert the filter in the dust bucket and attach the bucket to your appliance (image 6).Your vacuum is ready to use again.
Filter 2:
Detach the dust bucket (image 1).
Remove the filter case and take the filter out (images 2–3).
Tap both filtersto release loose dirt (image 4).
Wash the foam filter under the tap (image 5). Note: please do not rinse the filter casing under the tap.
Ensure that the foam filter is completely dry before reinserting it into the device (images 6–8). Your vacuum is ready to use again.
Note: for optimal performance, we recommend cleaning the filter of your vacuum cleaner monthly and replacing the filter every 6 months (Accessory FC8009/01). Brush Your Philips Cordless Vacuum SpeedPro Max has a rotating brush located inside the nozzle. This brush can become clogged with hair and needs regular maintenance. Please follow the steps below and refer to the videofor more information:
Remove the brush with the easy button (images B1–2).
Pull out any strands by hand.Tip: Cut off any tangled strands using scissors (image B3).
Check for hair and/or dirt under the side cap and loosen the side cap from the brush by pulling it.
Place the side cap back by pushing it until you hear a click and snap the brush back into place (image B4). Your vacuum is now ready to use again.
Water Tank We recommend cleaning and drying your Aqua tank after each use. Here is how you can do this in a few simple steps:
Remove the cloth from the water tank.
Empty the water tank (image C1).
Clean the water tank under the tap and shake it gently (images C2–4).
Empty the water tank by rotating it multiple times to ensure that the tank is completely empty (images C5–9).
Let the water tank dry and clean the cloth by rinsing it or putting it in the washing machine (images C10–12).